Showing posts with label Anastasia Beverly Hills. Show all posts

Wednesday, June 17, 2015

Which Brush Should I Use? - Part 1 of 3

"What is that brush used for?" That  is one of the biggest questions to ponder as you increase your skills in perfecting your makeup application. Some brushes have multiple uses, and some you may not use at all! Makeup is a form of art, and like most art, application is based on personal preference.

When contour was first established everyone was doing it in a certain way and from those basic guidelines different variations of contour took place. Some new questions arose "do I use cream, do I use powder" and then of course the question of  "which brush do I use to apply it?"

Did you ever give up on doing contour because you weren't sure how to apply it. Or feel as if you're not good enough at applying your own make up? Honey, It's not your fault! It may be your brush's fault. Maybe your brush is too old, maybe it needs a good cleaning as seen in our latest YouTube video.


Or you could possibly be using the wrong brush and another brush would give you the results you dreamed of! If you're wanting a starter kit that will give you the options to learn the art of make up application without breaking the bank. I recommend BH Cosmetics 36 Ultimate Brush Set. It offers a range of different face and eye brushes at a price in the $30 dollar range!

For starters, lets break down what you get. This portion of the blog will feature items 1-12 and is the first part of a three part blog series.

Picture from BH Cosmetic Website of the 36 Ultimate Brush Set
Item 1: Eyebrow Brush
Its funny how this is considered and eyebrow brush, because I would also use part of this for my eyelashes. I personally call it a dual lash and brow brush. The "brush" part of this is used for grooming and shaping brows, I have sparse brows so this tool really does nothing for me but if you got some wild brows this may help brush it so your hairs go all in the same direction. The "comb" is a great tool to help when your mascara clumps together. Because no one likes tarantula legs for eyelashes!

Item 2: Spoolie Brush.
It looks like a mascara wand, but instead of using this for mascara, I use this as my brush comb instead of item 1's brush. I love Anastasia Beverly Hills products for my sparse brows, and their brow wiz comes with one end as a spoolie brush, so I rarely use this tool from the BH set.

Item 3: Small Fan Brush
Here is one of those wonderful brushes that I use for different applications. I would say that the number one reason this brush is used for is for clean up. For example, when using powder eye shadow for a smoky eye where there are little specs of black, gray, or other dark colors that fall out. If you don't use shadow shields to catch the fall out then your catching these specs onto your skin. And if you use your fingers to brush the eye shadow specs away you may actually smudge the flecks and give yourself a black streak. Not cute! This small fan brush is perfect for brushing away those specs without smudging. Another use for this fan brush is for light application of powder products such as  contour or highlight. I love using a matte grey eye shadow and casting a "shadow" to make my face appear less round than it is (foodie girl problems)! It helps blend the shadow without casting harsh lines on your face. The same goes for highlighting on top of your cheek bones, it creates the glow without it being overpowering. Keep this brush as part of your go to set!
Item 4: Shadow Sponge Brush
Throw this sh*t away!
You have so many brushes in this kit to achieve what you need. Stop trying to use this product sucking sponge! However, if you're against throwing away something that you paid for, give this to your little niece or daughter so she can play with it!
For your convenience of not having to keep scrolling up I will keep featuring this image.

Picture from BH Cosmetic Website of the 36 Ultimate Brush Set
Item 5: Eyeliner Brush
Pretty self explanatory, one of the few eyeliner brushes that is provided in this set. If you're starting out, I would recommend trying this brush with your gel eyeliner. This is a good brush to help you get started on learning how to wing out your eyeliner. Just try to get as close to your eyelash line as possible. And if you get blank spaces you can always go over it again, also known as tight lining, with the brush again or an eyeliner pencil. Another use for this brush is to help line your eye shadow to do a cut crease. Which is a harder look to do for a novice, definitely have to take it slow and steady to create the look.

Item 6: Angled Liner Brush
Another one of the eyeliner brushes in this set, its great for those of you have more experience with winging out your eyeliner or wanting to go a little thicker of a liner line. But this is another brush with dual purpose. You can also use this to line your brows.
As the picture tutorial shows, the angled liner brush is featured in both pictures 3 and 6. As you can see, the angle liner brush is used for shaping the brows. This picture tutorial was done by one of the most talented makeup artists out there, Vegas_Nay! Who features her work and lots of other Makeup Artists on her Instagram page.

Item 7: Rounded Liner Brush
Since the BH set  has given you a few liner brushes, I wouldn't use this for my eyes, I'd use this to blend in my lipsticks or liquid lipsticks. This would help blend colors together without giving it a color block appearance. When you see the word ombré, think of it as a gradient of colors. Typically the most common examples are when you have that darker color on the outside and the lighter color in the inside. But that's is not always the case. For instance in this picture by Beauty Inside you see the darker color is in the inside and it fades into a neutral color. This was done with using a rounded liner brush to give her that porcelain doll look, which is very popular Asian Beauty trend.


Item 8: Bent Eyeliner Brush

This would be an eyeliner brush again. This is great for the inner corners of your eyes. Sometimes if you're not careful with the regular liner brush you may smudge your eyeliner. The bent feature helps get into that tiny crevice and help with your precision. Don't worry if you don't get it right the first time or 100th time, no matter how many times I've done eyeliner, I still mess up. Your eyeliner can sense your fear!
Picture from BH Cosmetic Website of the 36 Ultimate Brush Set
Item 9: Small Smudge Brush
I bet, you're at this point where you didn't think there were this many brushes for doing your makeup. Even sometimes I can feel overwhelmed. But sometimes its a great thing about having so many brushes, especially when you can't find one, then you can make due with another. For this brush, its a good one to smoke out or blend your lower lash line. So if your eyeliner application is too much just blend it out, or put powder on the brush and also blend it out for a nice blended lower lash line.

Item 10 & 11: Small Angled Liner Brush and Small Rounded Liner Brush
See descriptions for items 6&7. Its the same idea just smaller for better precision.

Item 12: Flat Liner Brush
I would like to concluded with the flat liner brush. You can use this as another eyeliner brush, but I prefer to use this as the highlighter/concealer component of doing my brows.

As referring to Vegas_Nay's brow tutorial picture again, you can see the flat liner brush as picture 8 and 9.

Just remember there's not one right way to use your brushes, the best thing you can do is play around until you discover the best purpose for the brush. Keep your eyes out for the next installment of this blog series! Where I will cover even more of the different types of brushes!

Glammie Love,
Bex

Tuesday, April 28, 2015

1 Product, Multiple Uses!

Have you ever gone on vacation or been in a rush and forgotten your go-to products? And it isn't until you're already at the airport that you realize your cosmetics are in the makeup bag next to your front door, which was strategically placed there so that you didn't forget it...yeah, I haven't done that either!  In all seriousness, I have forgotten my go-to products before and realized it in the car ride to the airport or at my hotel room. Or maybe you have the memory of an elephant (take that as a compliment) and have never forgotten any product, right down to your teal eyeliner, which you may or may not use with the outfit you have planned for Sunday Brunch.  If the latter description is you, then maybe your makeup bag is weighing you down! Bottom line, no matter which category you fall under, this blog post may be helpful.

I have scoured the Internet, and now, I think I have a great collection of some I tips I already knew, some that I'm still playing with and some that I can swear by!  So, maybe you can rethink whether you need to bring all that makeup with you, or maybe, after reading this, you'll be able to make the best of what makeup you did remember to pack!

Lipstick Is The New Hero for Dark Circles!

Apparently, there is some serious science behind this.  If you look at a color wheel, you will see that orange-red is opposite from blue, and combining the two will cause color neutrality.


iStockphoto / Via Getty Images

Picking out the right color of red-orange or coral lipstick is something to play around with. The deeper your skin, the more reddish orange you can work with.  If you have a more medium or tan complexion, try to go more toward a warm coral, or if you have a light complexion, try a more yellow, peachy shade (and, if you are in this boat, maybe a color concealer would work better than lipstick).

The Blondeshell / theblondeshell.com

I've noticed that, if I go with a straight red, even after I blend it well, I still see a hint of pink popping out. A warm coral color is my go-to! Also, if you have the color you need in a cream lipstick, go with that, as compared to a matte lipstick, just because it's easier to blend.  Make sure you do the lipstick first with an eye shadow brush, and then put your foundation, concealer and powder on top in order to set it.  I like to blend my foundation and concealer with a beauty blender sponge.  This trick also works for any dark pigmentation left over from acne scars.  Now, you can say bye-bye to dark circles and spots!

Deepica Mutyala / Via birchbox.com

Highlight Like The Golden Goddess You Are!

The key to using an eye shadow as your highlighter is all about shimmer and not glitter.  Shimmer is a shade that will give you a luminous, subtle sheen.  Glitter is all about the sparkle, with tons of little particles reflecting light.  Unless you're a little girl throwing a princess party, you do not need any glitter on your face, unless of course you are Kesha (in which case, do your thing!).  I hope that most people who have eye shadow palettes have one of Urban Decay's Naked Series (if you don't, other neutral palettes will work, but we are using the Naked Series as a convenient example).  If you do have a Naked Series palette, either Naked or Naked 2, then you have a pan called Half Baked, which is the golden-bronze swatch with a shimmery finish. Use a highlighter brush and give your cheeks that soft glow!


Sephora.com / Urban Decay Naked 2 Palette

Matte Is In... In More Ways Than One!

Matte lipstick and matte eye shadow are both components of a current and ongoing trend.  The best part of this trend is that you can use your matte eye shadow as a brow filler.  Taupe (Warm Taupe) works well for blonde and silver/white brows. 


For brunettes, I would stay away from warm browns and go more towards an ashy brown (Rich Brown). I'd suggest a warm brown (Hot Chocolate) for auburn hair because the warm tone will look more natural than an ashy brown color.  And lastly, if you have brown black or jet black hair, I would stick to a charcoal brown (Smoke). All of these eye shadows, which I linked, are $12.00 on the Anastasia Beverly Hills website, except for the Warm Taupe, which can be purchased at your local Macy's in the Anastasia Beverly Hills pop-up store.  Or if you want to test the colors before purchase, head to the closest Macy's and test to see if these are the right shades for your brows!  The key is to find a neutral shade and to avoid any shadow with a shimmer or satin finish.  (Unless you're rocking the teal hair trend... in which case, don't let me stop you by telling you what color to do your brows!)
Anastasia Beverly Hills Eye Shadows

Get yourself a small Z Palette, and you can call this your matte eye shadow/brow palette!


Prime Those Eyes With Concealer!

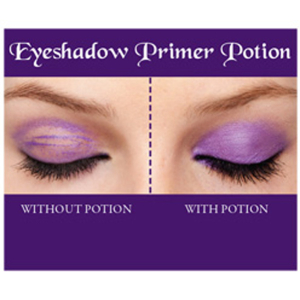
Do you see an oily shine on your eyelids that is looking back at you in the mirror?  You, my friend, may be suffering from oily eyelids, which means you cake if you don't prime!  Years ago, Urban Decay (as seen in the picture below) solved this problem with the eye shadow primer, but there have been times where I definitely forgot to pack this with me when I traveled.
Urban Decay Eye Shadow Primer

Fear not because your concealer has got your back!  Stick to a heavy-duty cream concealer, which will fill your crease better than a liquid concealer.  I use my Benefit Boi-ing to take over when I forget my eye shadow primer.  I personally use my finger, but you can use your brush.  Just make sure you apply an even, and let it dry a bit before you start adding your shadow.  After that, may the power of makeup last all day for you!  Of course, I do recommend that you always use a setting spray (Model in a Bottle) to help your makeup last all day!

Go forth makeup lovers and enjoy these tricks!

Glammie Love,
Bex

Saturday, November 15, 2014

#SaturdaySavings- November 15, 2014

Happy Saturday Savings! 

Why go outside and face the cold weather and crowds? Stay in and do your shopping online! 
And what is nicer than staying warm at home and not fighting through a checkout line, adding discounts to that list!


We have some new and reoccurring savings listed below! 
Let your glam addiction shine through!


Gerard Cosmetics:
choose any combinations of 4 lipsticks or lip glosses for $39
Promo code: lips4you

Whitening Lightning:
whitening pens 2 for $19
Promo code: superpendeal

Sedona Lace Brushes:
4 dollars off brushes, minimum of $15 purchase
Promo code: Laurag_143

Sephora:
Free Holiday Sample Bags Featuring 8 Samples With Any Online Merchandise Order $25+
Promo Code: SEASONSET
www.sephora.com

GLAMGLOW
30% off, not valid on gift cards or sample sexy:try before you buy
Promo Code: IPSY

BH Cosmetics: 
Save an extra 5% on every order + free shipping when you spend $50+
Promo code: 6JCQERN2

Morphe Brushes:
10% off for a limited time, does not include Z palette
Promo code: JACATTACK

Ulta: 
$3.50 off your purchase of $10+ and free shipping for purchases of $25+
Promo Code: 209037

Sigma: 
10% off
Promo code: MISSYOU10

Too Faced: 
20% off 
Promo Code: makeuplove

Anastasia Beverly Hills: 
10% off your order for registering
Promo code: WELCOME10

Nyxcosmetics: 
25% off your purchase + free shipping
Promo code: WELCOME25

Glammie Love! 

Wednesday, November 12, 2014

October Favorites 2014


Here are our favorites from the month of October!

Hair/ Nails:

  • Sally Hansen Big Matte Topcoat ($5.99)
  • Suave Professional Moroccan Infused Dry Shampoo ($3.99)
Lips:


    • Maybelline Colorsensational Matte Lipsticks: Siren in Scarlet, Mesmerizing Magenta, Divine Wine ($7.49)
    • Bite Beauty Cashmere Lip Cream: Sancerre ($28.00)
    From Left to Right: Sancerre, Divine Wine, Mesmerizing Magenta, Divine Wine

    Eyes: 
    • Anastasia Beverly Hills Tamanna Palette ($29.00)
    The Tamanna Palette From Left to Right: Fresh, Bush, Venezia, Gilded, Custom, Sangria*, Bengal, Chocolate, China Rose*, Noir
    • Lorac Mega Pro Palette (sold here) (it looks like it's all sold out on the official website but you can grab one off of ebay)
    Top Row of the Mega Pro: Cream, Fawn, Camel, Sepia, Dusty Plum, Orchid, Mulberry*, Espresso
    Second Row of the Mega Pro: White, Khaki, Brown, Stone, Lilac, Wisteria, Gray, Black
    Third Row of the Mega Pro: Opal, Sand, Copper, Sienna, Apricot, Blush, Merlot, Indigo*
    Last Row of the Mega Pro: Vanilla, Cashmere, Smokey Topaz*, Dusty Rose, Granite, Maroon, Deep Teal, Caviar
     *These shades were mentioned in the video
    Face:
    • Revlon ColorStay Whipped Cream Makeup Foundation: 310 Caramel ($13.99)


    Thursday, October 9, 2014

    Air Travel Essentials - Part 3 of 3

    Well, here it is... The final installment of my Air Travel series!  If you haven't read part one or two, you can just click on these links: Part 1, Part 2.

    What more do I have to impart to y'all, you ask?  Well, it occurred to me that this is a makeup-centered beauty blog, so I would be remiss if I didn't include any sort of makeup in the series.

    I'm going to be honest: I usually don't put makeup on after a long plane ride.  Travel in and of itself is tiring and stressful, so I don't usually feel like putting much effort toward my appearance until after a hot shower.  After all, who do I have to impress?  I'm married!  (I'm joking, of course... I'm a firm believer in the notion that makeup is not to impress others, but to make yourself feel beautiful and confident.)  Nevertheless, there have been a few times where I felt like putting on some pre-baggage claim makeup was a necessity.  It's usually when I have to head to a meeting or an event right after landing, with no time for a stop at the hotel.  For these times, I have a simple makeup routine that I use.

    Post-Flight: Looking Fresh-Faced

    When putting on makeup at the airport, I'm not trying to look like a Kardashian.  Even though everyone knows that I love to contour my face, there's a time and place for that, and an airport bathroom is definitely not it.  I just try to make myself look bright-eyed, fresh-faced and well-rested (even when I'm not any of those things).   I need products that aren't only easy to pack, but also easy to use and that don't require a lot of tools.

    From Left to Right: Smashbox Camera Ready CC Cream, NARS Radiant Creamy Concealer, Too Faced Perfect Eyes Waterproof Eyeliner, Smashbox Waterproof Kohl Liner, Anastasia Beverly Hills Brow Wiz, Vincent Longo Lip/Cheek Gel Stain, Too Faced Better Than Sex Mascara, Estee Lauder Bronze Goddess Bronzer and BH Cosmetics Kabuki Brush
    This photo might as well be titled "Jaz's Must-Have Makeup Products."  I swear by every single one of these products, but I do realize that they can be pricey, so I will also list a drugstore alternative for all you thrifty glammies.  Also, while I usually advocate for using brushes because they're more hygienic, I realize that it's probably not convenient in this case, which means applying with my clean fingers, unless otherwise stated.  Anyway, here's what my simple airport makeup would look like:

    This look is simple, effortless and only takes about 5-10 minutes!
    Y'all should know by now that I strongly promote hydrating your skin after being on a plane, and it doesn't stop when I put on my makeup.  I tend to favor a CC or BB cream like this one by Smashbox ($42) over a traditional foundation because it hydrates much like a moisturizer would, while still evening and perfecting my skin.  A great drugstore alternative would be the Maybelline Dream Fresh BB Cream ($7.19).

    After putting on my CC Cream, I highlight my under-eye area with my NARS Radiant Creamy Concealer ($29) to brighten up my eyes, as well as dabbing a little on my forehead, chin and cupid's bow.  A drugstore alternative for this would be Maybelline Instant Age Rewind Eraser Concealer ($7.99).

    I feel like a defined brow really makes a girl look effortlessly put together, and the Brow Wiz ($21) is the hands-down best product in the market for this.  The formula of the pencil glides on easily without smudging, and the little spooly brush on the end helps to brush the hairs into place.  The alternative to this product would be the Revlon Brow Fantasy ($5.91).

    I love eyeliner.  I actually have been known to walk out of the house wearing nothing on my face but eyeliner, and I felt completely put together.  For this particular look, I take Too Faced Perfect Eyes Waterproof Eyeliner ($18), line the outer half of my eyes and smudge it a little on the ends.  CoverGirl Perfect Point Plus ($5.69) would also do the trick.  Just for extra oomph, I hit my waterline with a nude eyeliner, which makes my eyes look even bigger.

    Vincent Longo ($22.50) makes one of the best lip and cheek stains that I've ever used.  I love stains because they look effortless, but I dislike them because they tend to be drying.  This one is one of the very few stains that don't dry out my lips.  The best part is that it can be dabbed on the cheeks, and you can use it as a blush!  I love multi-purpose products for traveling!  The drugstore option for this item is the Revlon ColorStay Moisture Stain ($7.99).

    Bronzer is a completely optional part of this makeup look.  I personally prefer to just touch the outside of my face with bronzer to slim it, but I realize that it's not for everyone.  If you were to use bronzer, my favorite is the Estee Lauder Bronze Goddess Powder ($36.)  I also like the Maybelline Fit Me Bronzer ($4.40).  I apply my bronzer with the BH Cosmetics Kabuki Brush ($11.01), which I love for travel because, even though it's dense and fluffy, it comes at a great price and even includes a cute little leather carrying case.

    Of course, no look is complete without some mascara to make your peepers pop.  I never thought that the Better Than Sex Mascara ($23) by Too Faced would ever be topped on my list, but it seems that L'Oreal's Voluminous Miss Manga Mascara ($7.99) is giving it a run for its money.

    There you have it!  That's all of my air travel tips!  Thanks for sticking with me for all three of these posts... I know that they're super long.  I hope you found at least a couple of tips that were helpful.  Happy flying!

    Glammie Love,
    Jaz

    Monday, September 29, 2014

    September Makeup Haul Part I

    The best part of internet shopping is that it feels like its Christmas time, no matter the season! You eagerly track your products to see when the goodies will be delivered to you door. Then, it happens... The sheer joy you receive when you see the cardboard box arrive and you rip it open to see all the cosmetics and brushes spill out onto your lap.

    Part I of this Makeup haul will feature:
    Sigma Tapered Highlighter Brush F35 sold for $24.00 on their website and $24.00 on Amazon
    Anastasia Beverly Hills Build Your  Own: Contour Palette, $14.00 for individual pans, but highly recommended to bundle 6 pans for $40.00

    Anastasia Beverly Hills: Build Your Own: Contour Palette + Sigma F35

    Out of all my makeup haul goodies, these 2 products are what I was most excited about.

    Back in August, I bought Becca: Shimmering Skin Perfector Pressed- Moonstone, $38.00 as my new highlighter, since I wanted to try a powder highlighter to replace my highlighting creams, which I had been using. However, I was struggling to determine the best brush to use for my new powder highlighter. Borrowing my glam partner Jaz's Sigma Tapered  Highlighter F35 Brush cued a lightbulb going on and "angelic realization music" in my head (if you cant imagine it, listen to the first 4 seconds of The Simpsons Opening Scene). I mean, after all, Sigma is a name brand and used by professional makeup artists everywhere, so if you can't afford to buy the entire set, know which brush to splurge for, and this brush is definitely it! But if you're going to have a nice brush, you have to have options, and that is when I decided it was time for a customized contour palette.

    The great thing is, if you're the type to feel overwhelmed by so many options, Anastasia makes preselected contour kits. On the other hand. if you're like me and you want to study your options and do some research, then this is an idea on how to go about doing it. I do not live anywhere near an Anastasia Beverly Hills Salon, so it took research and a leap of faith to select the right 6 pans.

    Step 1: Find inspiration on Instagram, preferably with someone that appears to have similar skin tones, and of course take a screen shot! 


    Thanks to Jayrozze24, this picture alone has made it so much easier for me to select the right pans: Champagne, Banana, Peaches & Cream, and Camel!  These checked off 4 out of the 6 shades I needed.

    I still, however, had 2 more spots to fill. This involved more digging, since I was not one of the lucky people to have the contour book at my disposal.

    Step 2: Google Search

    Nothing like a quick Google search to answer your questions, or in this case feed my makeup addiction. One of the top few links took me to
    http://www.lindastephanie.com/anastasia-contour-book-contour-kit-refills/


    And here we can see has the picture of the pan, the pan name, and the description...PERFECT!
    If you cannot read the print, I urge you to visit the site for an easier read.


    After going back and forth for 30 minutes, and coming close to pulling out my hair (just kidding, I don't do that, its not good for your hair), I was able to pick out 2 more colors: Golden Peach and Clay. I wanted to have a shade that was for light to medium and another shade for medium to tan. I did this because, like most people, I know I get quite a bit darker in the summer and fall, and then I will get lighter during the winter and spring. 

    Top Left to Right: Champagne, Banana, Golden Peach

    Bottom Left to Right: Peaches & Cream, Camel, Clay


    Swatches


    Champagne is a highlighter, and if you would want more depth to it, I recommend putting champagne over Banana. As you can see, I have a huge chunk of Peaches & Cream on my arm, but it was because, when the flash was not on, it appeared to be identical to my skin, making it hard to see where I put the original swatch mark. This means that, when I start getting a bit paler, it will be a great skin tone color to set any creams I may be wearing. The same is true for Banana, which will be a lovely shade to set my concealer under my eyes. As for Camel, I love how it is a light contour. I will probably use this to enhance my nose. It will not be too abrasive like some makeup fails where your nose looks like a rectangle has been outlined on the middle of your face. Lastly, Clay will be perfect since it's dark enough to help enhance my cheeks. Deep colors and shades are definitely in style for fall!  

    Stay Tuned for Part II and Part III of the September Makeup Haul.

    Be sure to follow us on Instagram and Facebook!

    Glammie Love,

    Bex