Showing posts with label Beauty. Show all posts

Monday, March 23, 2015

Drugstore Superstars: Primers


For me, it's absolutely essential to put on a face primer before applying makeup.  You wouldn't paint a wall without putting down a primer first, and the same concept applies to your face.  There are primers that help with oil control, some that minimize pores and some that even out skin tone, but the main reason for using a primer is to provide a barrier between your skin and your foundation.  In other words, it evens out the texture of your skin, your makeup goes on more smoothly and the wear is prolonged.  There are some primers that have a very thick, almost whipped consistency, and then, there are some that are thinner and go on your face more easily.  It's all a matter of preference as to which one you prefer.  I have great products for each option, which you can find below.

Face Primers


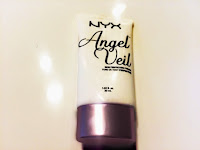
NYX Angel Veil Primer ($16.00)


This is my all-time favorite drugstore primer!  It mattifies my face, blurs my larger pores and leaves my skin feeling silky smooth.  The formulation reminds me of a mix of the silky finish of the Mineral Veil Primer by Hourglass and the consistency of the Primed and Poreless Primer from Too Faced.  Some other bloggers have complained that the primer was runny and thin, but I never found that to be the case with mine.  I'm not sure if NYX has changed the formulation slightly or if I'm just lucky, but make sure to give the tube a nice shake before applying the product, just in case.  One thing that I did notice, however, is that it can leave a slightly white finish on the skin.  This can actually be a positive for people with fair to medium skin tones because it causes a brightening effect, but for darker skin tones like mine, it can create a bit of a white cast on your face.  Nevertheless, it doesn't affect the color of your foundation, so I didn't feel like it was a truly serious drawback.

Revlon Photoready Perfecting Primer ($9.99)


When you pump this primer out, it almost feels like it has too thick of a consistency.  However, it effortlessly blends into your skin and feels surprisingly lightweight.  This primer is best for blurring fine lines and minimizing pores.  A little bit goes a long way with this, so just one pump is more than enough to cover your entire face.


Maybelline Master Prime Primers ($7.94)


For those of you who don't really need help in blurring fine lines or large pores (first of all, you go, Glen Coco!), the two primers that I mentioned above might be too thick for you.  In that case, the Master Prime would be a better fit.  There are three different variations of this primer: Blur + Smooth, Blur + Redness Control and Blur + Illuminate.  All three have the same basic formulation, just with a couple minor differences that I'll mention in a second.  First of all, I don't really understand why the word "blur" is in the name because I didn't notice it doing anything of the sort.  What the lightweight primer does do, however, is hydrate and even out the texture of your skin so that foundation application is smooth and easy.  I would recommend this primer for people with dry to normal skin because of the hydration aspect.  On the other hand, since it doesn't mattify your face, people with oily skin might want to look elsewhere.  The Blur + Redness Control has a slightly green tinge to it, so it helps neutralize the skin color of anyone that struggles with redness, without being overpowering.  The Blur + Illuminate has a pinky, pearl-like finish, giving the skin a luminous and dewy look, which is great for people with dry skin.

Eyelid Primer


Wet 'n' Wild Take on the Day Eyeshadow Primer ($4.99)


For someone with oily skin, I've never found my eyelids to be all that oily. Because of that, eyeshadow creasing hasn't been a big problem for me.  My fellow glammie, Bex, does have that problem, so putting on an eyeshadow primer is an absolute must.  We found that this product is the best drugstore product of its kind to prolong your eyeshadow's wear, and to make sure that the color doesn't fade or crease on your eyelids.  You do, however, have to use this product sparingly.  If you put too much on, the opposite effect will happen and your shadow will crease almost immediately.  The trick is to put a little bit on your lid, blend it well, and make sure you let it dry and set before you put anything on top of it.  It doesn't exactly make your shadow look more vibrant, so that's why I would recommend using it in conjunction with one of the following eyeshadow bases. 

Eyeshadow Bases


Eyeshadow bases are not to be confused with primers.  Primers are made to prep your eye for shadow, and bases are designed to make the colors of your eyeshadow more vibrant.  I have a couple of favorite bases from the drugstore. 

Maybelline Color Tattoo Cream Gel Eyeshadow ($5.29 - $5.99)


These come in a variety of colors, but my favorites are the "leather" series because they're matte. They are almost an exact dupe for my favorite base of all time: the MAC Pro Longwear Paint Pot.  They are super creamy, easy to blend, quick to dry and will stay on your lids all day long.  These also don't crease on my eyelids, but it doesn't exactly block oil; so, if you have oily lids, use an eyeshadow primer first.  The best part is that it isn't super sticky on the lid, like most other bases, so you can actually just use it by itself, without shadow.   


NYX Jumbo Eye Pencil ($4.50)


For those of you who prefer pencils to cream pots, there's the NYX Jumbo Eye Pencil. These eye pencils have a bit of a cult following in the beauty blogger world because they really do intensify any eyeshadow color.  I actually feel like it does a better job than the Maybelline Color Tattoos, but the reason why they're lower on my list is because I feel like it's harder to blend and quite a bit stickier, meaning that you can't wear it on its own.  I'm all about the multi-functional products!


TLDNR


OK, I know I can be really long-winded, so here's a little chart to help all you super busy people figure out which primer is best for you.

Face


Blurs Pores and Fine Lines
Mattifies Face
Smoothes Skin Texture
Brightens
Moisturizes
Light-weight
Neutralizes Redness
Angel Veil
X
X
X
X


Photoready
X
X
X


Blur + Smooth


X

X
X

Blur + Redness Control


X
X
X
Blur + Illuminate


X
X
X


Eyes


Prevents Creasing
Prolongs Wear
Blocks Oil
Prevents Fading
Intensifies Color
Wet N’ Wild
X
X
X
X

Color Tattoo
X
X

X
X
Jumbo Eye Pencil

X

X
X

So, there you have it, the best drugstore primers on the market!  Which ones are your favorites?  Stay tuned for the next part of the series: Foundations.  Happy shopping!

Glammie love!
Jaz
Wednesday, March 18, 2015

Drugstore Superstars

If you're new to the world of makeup, the task of starting a cosmetics collection may seem daunting.  Since there are so many products and brands, it can be hard to know which way is up and which way is down.  That's why, whenever a friend who is just getting started asks me for guidance, I always point them in the direction of the nearest drugstore.

Makeup can be expensive.  (Trust me, I should know.)  In fact, I'm somewhat of a makeup hoarder, and if I go unchecked, I can spend hundreds of dollars at Sephora in the blink of an eye.  I know, however, that spending a big chunk of your paycheck on makeup is an absolutely ridiculous notion to most women, which is why drugstore makeup is so great.  Makeup application is very much a process of trial and error, and you need to try something on in order to figure out what works for you and your skin.  Bottom line: If you don't like a certain product, a $7 loss is easier to swallow than a $50 one.  Unfortunately, since there's so much out there in the way of drugstore makeup, it's hard to separate the good quality products from the bad.  That's what this series will focus on; I'm going to help you navigate through all the affordable brands to find out which products you should try out and which ones you should leave on the shelf.

In order to make it more navigable, I'll be breaking down this series by categories:

1) Primers;
2) Foundations;
3) Concealers;
4) Bronzers;
5) Blushes;
6) Eyeshadows;
7) Eyeliners;
8) Mascaras and Brow Products;
9) Lips;
10) Setting Products; and, last but certainly not least,
11) Makeup Tools.

Hopefully, after I finish this series, you'll have all the information that you need in order to go out and start (or add to) your makeup kit.

Glammie love!
~Jaz

Thursday, October 9, 2014

Air Travel Essentials - Part 3 of 3

Well, here it is... The final installment of my Air Travel series!  If you haven't read part one or two, you can just click on these links: Part 1, Part 2.

What more do I have to impart to y'all, you ask?  Well, it occurred to me that this is a makeup-centered beauty blog, so I would be remiss if I didn't include any sort of makeup in the series.

I'm going to be honest: I usually don't put makeup on after a long plane ride.  Travel in and of itself is tiring and stressful, so I don't usually feel like putting much effort toward my appearance until after a hot shower.  After all, who do I have to impress?  I'm married!  (I'm joking, of course... I'm a firm believer in the notion that makeup is not to impress others, but to make yourself feel beautiful and confident.)  Nevertheless, there have been a few times where I felt like putting on some pre-baggage claim makeup was a necessity.  It's usually when I have to head to a meeting or an event right after landing, with no time for a stop at the hotel.  For these times, I have a simple makeup routine that I use.

Post-Flight: Looking Fresh-Faced

When putting on makeup at the airport, I'm not trying to look like a Kardashian.  Even though everyone knows that I love to contour my face, there's a time and place for that, and an airport bathroom is definitely not it.  I just try to make myself look bright-eyed, fresh-faced and well-rested (even when I'm not any of those things).   I need products that aren't only easy to pack, but also easy to use and that don't require a lot of tools.

From Left to Right: Smashbox Camera Ready CC Cream, NARS Radiant Creamy Concealer, Too Faced Perfect Eyes Waterproof Eyeliner, Smashbox Waterproof Kohl Liner, Anastasia Beverly Hills Brow Wiz, Vincent Longo Lip/Cheek Gel Stain, Too Faced Better Than Sex Mascara, Estee Lauder Bronze Goddess Bronzer and BH Cosmetics Kabuki Brush
This photo might as well be titled "Jaz's Must-Have Makeup Products."  I swear by every single one of these products, but I do realize that they can be pricey, so I will also list a drugstore alternative for all you thrifty glammies.  Also, while I usually advocate for using brushes because they're more hygienic, I realize that it's probably not convenient in this case, which means applying with my clean fingers, unless otherwise stated.  Anyway, here's what my simple airport makeup would look like:

This look is simple, effortless and only takes about 5-10 minutes!
Y'all should know by now that I strongly promote hydrating your skin after being on a plane, and it doesn't stop when I put on my makeup.  I tend to favor a CC or BB cream like this one by Smashbox ($42) over a traditional foundation because it hydrates much like a moisturizer would, while still evening and perfecting my skin.  A great drugstore alternative would be the Maybelline Dream Fresh BB Cream ($7.19).

After putting on my CC Cream, I highlight my under-eye area with my NARS Radiant Creamy Concealer ($29) to brighten up my eyes, as well as dabbing a little on my forehead, chin and cupid's bow.  A drugstore alternative for this would be Maybelline Instant Age Rewind Eraser Concealer ($7.99).

I feel like a defined brow really makes a girl look effortlessly put together, and the Brow Wiz ($21) is the hands-down best product in the market for this.  The formula of the pencil glides on easily without smudging, and the little spooly brush on the end helps to brush the hairs into place.  The alternative to this product would be the Revlon Brow Fantasy ($5.91).

I love eyeliner.  I actually have been known to walk out of the house wearing nothing on my face but eyeliner, and I felt completely put together.  For this particular look, I take Too Faced Perfect Eyes Waterproof Eyeliner ($18), line the outer half of my eyes and smudge it a little on the ends.  CoverGirl Perfect Point Plus ($5.69) would also do the trick.  Just for extra oomph, I hit my waterline with a nude eyeliner, which makes my eyes look even bigger.

Vincent Longo ($22.50) makes one of the best lip and cheek stains that I've ever used.  I love stains because they look effortless, but I dislike them because they tend to be drying.  This one is one of the very few stains that don't dry out my lips.  The best part is that it can be dabbed on the cheeks, and you can use it as a blush!  I love multi-purpose products for traveling!  The drugstore option for this item is the Revlon ColorStay Moisture Stain ($7.99).

Bronzer is a completely optional part of this makeup look.  I personally prefer to just touch the outside of my face with bronzer to slim it, but I realize that it's not for everyone.  If you were to use bronzer, my favorite is the Estee Lauder Bronze Goddess Powder ($36.)  I also like the Maybelline Fit Me Bronzer ($4.40).  I apply my bronzer with the BH Cosmetics Kabuki Brush ($11.01), which I love for travel because, even though it's dense and fluffy, it comes at a great price and even includes a cute little leather carrying case.

Of course, no look is complete without some mascara to make your peepers pop.  I never thought that the Better Than Sex Mascara ($23) by Too Faced would ever be topped on my list, but it seems that L'Oreal's Voluminous Miss Manga Mascara ($7.99) is giving it a run for its money.

There you have it!  That's all of my air travel tips!  Thanks for sticking with me for all three of these posts... I know that they're super long.  I hope you found at least a couple of tips that were helpful.  Happy flying!

Glammie Love,
Jaz

Wednesday, October 8, 2014

Air Travel Essentials - Part 2 of 3

Welcome back to my air travel essentials!  This specific blog post is about what you can do to nourish your skin and stay healthy while you're in the air.  This blog is part of a series, so if you haven't read part one yet, you can find it here.

In-Flight: Stay Hydrated

The humidity level in the cabin of an airplane usually averages between 10 and 20 percent, which is much lower than the typical indoor humidity of between 30 and 65 percent (#science).  Not only is dry skin a factor in premature aging, but it's just plain uncomfortable and itchy... That's why it's very important to stay hydrated during the flight.  I have a few tried and true tricks to do so.

Step 1: Cleanse, baby, cleanse!

Once I'm settled in my seat, I try to treat the plane as my own mini-spa, where I keep myself entertained and cozy and take care of my skin.  My first step is to take off any and all makeup that I have on my face.

From Left to Right: Nourish Organic Moisturizing Face Cleanser
and Neutrogena Cleansing Towelettes
I love to keep this particular cleanser in my little carry-on cosmetic case.  First of all, it's small enough to get past airport security, it's organic (so no harsh chemicals to strip your face of its natural oils) and it includes the moisturizing effects of cucumber!

Of course, washing your face with soap and water is the best, but sometimes we're not blessed with an aisle seat and easy access to the airplane lavatory.  In these particular cases, I pull out my trusty Neutrogena Cleansing Towelettes.  These towelettes are a holy grail item for me, as they take off every stitch of makeup... even waterproof mascara!

Now, I realize that not every flight is a long-haul flight, and sometimes, you want to come off the plane looking like you stepped out of a magazine.  By all means, you can definitely leave your makeup on for as long as you wish; the only thing that I recommend is to leave the mascara off of your face.  Mascara is the most susceptible to dry conditions since it tends to flake and come off into your eyes - something that nobody wants!  I would just keep your mascara in your purse and put it on when the pilot tells the cabin that he's starting his final descent.

Step 2: Drink Plenty of Water

I feel like this one's a no-brainer, but since it's important, I'm going to stress it anyway.  Bottom line: the best way to stay hydrated is to drink water.  It's tempting to order something carbonated or alcoholic (probably both) when the stewardess comes down the aisle, but these types of drinks just don't hydrate you nearly as much as plain old water.  I always try to buy a bottle of water in the airport before I board because you never know when a steward/stewardess will come down the aisle, especially when everyone else on board is sleeping.  However, if you do forget to buy some water beforehand, which is what happened to me on my last flight to South Africa, all is not lost.  You better believe that I parked myself in the galley and downed about nine or ten of those tiny glasses of water that they hand out while I had a pleasant conversation with the stewardess.  I stayed hydrated and got an extra pillow out of the deal, so I have to say it was a win-win situation.  There's no reason you can't do the same!

Step 3: Moisturize

After a couple of hours into a long-haul flight, most people settle in to sleep, read or watch another episode of The Big Bang Theory.  This is the perfect time for me, on the other hand, to really get my in-flight spa going.  Enter my favorite cabin-ready products:

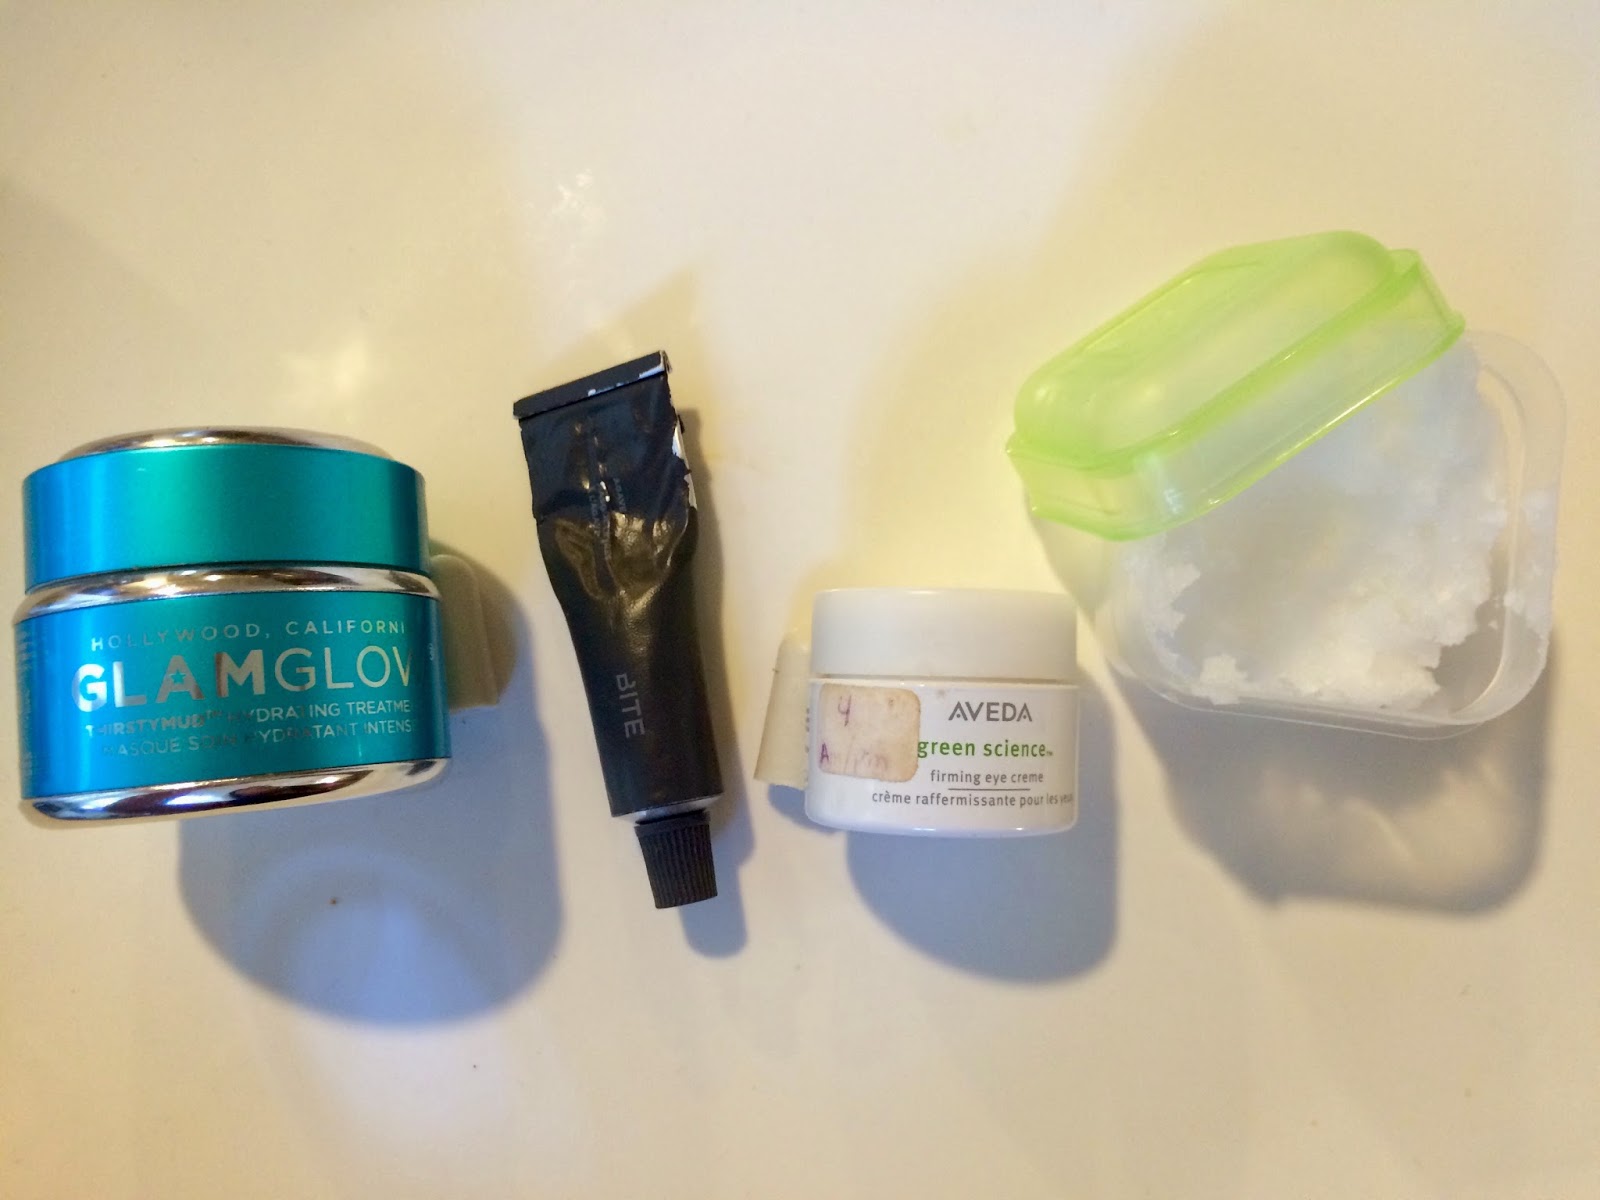
From Left to Right: GlamGlow THIRSTYMUD, Bite Beauty Agave Lip Mask, Aveda Firming Eye Cream and Coconut Oil
If I had to go onto a long-haul flight with only one product, I would definitely take my THIRSTYMUD.  Sometimes, after all the makeup, cleansing and exfoliating, our skin just needs a little boost of hydration.  Consider this your boost.  I usually put it on Sunday night (after neglecting my body for an entire weekend) and wake up on Monday morning with my face feeling soft, supple and youthful.  On flights, I slather this all over my face and let the mask work its wonders.  Thankfully, it's cooling, smells divine - sort of like coconuts and vacation - and it goes on relatively sheer, so you won't get any weird looks from people passing by.

My next essential is the Agave Lip Mask from Bite Beauty.  Annoying, chapped lips are definitely a thing of the past since I've been using this product.  I hate having any sort of lip treatment slide around my lips and face, so I love this product for its thickness.  It won't budge off of your lips and lasts for hours, which means that you won't have to keep reapplying.

The skin around your eyes is about a tenth as thick as the rest of your face, which means it can wrinkle a lot more easily.  Thus, because it's so delicate, the under-eye area needs to be treated as a separate entity, and it needs its own moisturizer.  The Firming Eye Cream from Aveda is one of the best eye creams I've tried because it goes on smooth, doesn't irritate my skin or my eyes and works on my eyelids as well.

Last, but certainly not least, is a little travel-sized tub of coconut oil.  You could say I'm a bit addicted to this stuff because I use it in everything from skin treatments to hair treatments and even in some recipes!  Because it's multi-purpose, it's perfect for travel.  I usually leave this treatment for last and put it all over my arms, elbows and hands.  Sometimes, when my hubby is feeling especially sweet, he'll give me a little hand massage with it (that's my super-deluxe spa treatment!).  I've also been known to rub a little bit on my fingers and run it through my hair to prevent fly-aways.

So, there you have it!  These are my in-flight beauty secrets.  Stay tuned for the final installment of this blog series tomorrow!

Glammie Love,

~Jaz

Tuesday, October 7, 2014

Air Travel Essentials - Part 1 of 3

I like to joke around with everyone that I've spent half of my life in the clouds.  I grew up in an expat family, so that meant that we moved every couple of years, which is something that I wouldn't trade for the world.  I've seen many places, experienced many cultures, met many people... and sat in many airplanes.  Luckily, my husband shares my passion for travel, so my travel experiences haven't stopped with marriage, and in fact, I'd actually venture to say that they have only increased.

Anyhow, seeing as how I've traveled pretty extensively, I'd like to think that I'm decently knowledgeable when it comes to air travel.  I'm not talking about actually flying a plane of course, or the physics allowing a 5 ton hunk of metal to soar through the air without crashing, but the art of sitting on an airplane for hours on end without going insane.  My biggest goal when I was younger was to make sure that I didn't get bored in the air; now, my biggest goal is to not get sick and to keep my body from turning on itself.

Everyone knows that being on an airplane is not a healthy environment.  The high altitude, coupled with the low humidity and the recycled air, can wreak havoc on your body - especially on your skin.  Luckily, through some trial and error, I think I've perfected a beauty regime for flying.  This will be a three part blog series: Pre-Flight, In-Flight and Post-Flight.

Pre-Flight: Prepare Yourself

Step 1: Cleanse Your Skin

I have very temperamental skin.  My face tends to break out at the slightest bit of change in my routine, whether it be in my diet, my hormones or my environment.  When I know that I'm about to get on an airplane, especially if it's a long-haul flight, I try to prep my skin as best as I can.  This means that I try to extract all the bacteria and gunk out of my pores before it gets further irritated by my surroundings while in-flight.  I have a few favorite masks for this:

From Left to Right: GlamGlow Powermud, Proactiv Skin Purifying Mask,
GlamGlow Supermud and Proactiv Refining Mask
GlamGlow's POWERMUD Dual-Cleanse Treatment is my absolute favorite mask to use on a weekly basis.  It acts like a regular mud mask and is super deep cleansing, but it turns into an oil after you rinse it off to moisturize your face.  Basically, it leaves your skin super clean and feeling velvety smooth.  You can pick it up here or here.

Proactiv's Skin Purifying Mask is also a great medicated clay mask for use on acne-prone skin.  I do, however, prefer to use it as an overnight spot treatment as I don't like the tightening effect that it has on my face.  When I dab it on a problem area at night, I wake up the next day, and it's gone... miracle!  Buy it here.

GlamGlow's SUPERMUD Clearing Treatment is multiple award-winning and by far the most intense mud mask I've ever used.  I can actually see the gunk coming out of my pores (so gross!).  The only problem is that it's pretty drying, so I only use this one when my skin is behaving especially badly.  Grab it here or here.

Proactiv's Refining Mask works a lot like their skin purifying mask, but I feel like it's a bit more potent.  The only problem is that the sulfur smell is also more potent, so for those who don't mind the smell, this one works amazingly well.  Otherwise, I would refer you to the SUPERMUD.  Anyhow, you can try it out for yourself here!

Step 2: Moisturize

After I thoroughly cleanse my skin, I make sure that I completely moisturize my skin to prepare my face for the climate of the plane.  Seeing as though I usually use masks at night, I prefer to use a face oil afterwards.  I feel like my skin absorbs it better and more quickly than a lotion, so it ends up on my skin, as opposed to my pillow.  I only need 3 or 4 drops of this stuff for my face to feel completely nourished!

Tarte Pure Maracuja Oil: My favorite face oil ever!  You can buy it here!
Step 3: Boost Your Immune System

I'm not really a germaphobe per se, but when I'm flying, I do want to do my part to ensure that I don't get sick from all the germs in the air.  Usually, an adventure is waiting for me at the other end of my plane ride, and adventure isn't as fun when you're sick.  Enter my favorite germ-fighting duo: Vitamin C and hand sanitizer (I haven't added a picture of these since I'm not really partial to any one particular brand.)  I also take a vitamin before I head out to the airport and make sure to keep my hand sanitizer handy (pun intended) in my purse or carry-on at all times.

Now that you're cleansed, moisturized and boosted, you're ready to board!  Look out for Part 2 in this series tomorrow: In-Flight Essentials.

Glammie Love!

~Jaz

Tuesday, September 30, 2014

September Makeup Haul Part III

For the last part of the September Makeup Haul Part III

All the glory will go to:
RIMMEL LONDON ScandalEyes Waterproof Kohl Kajal Eye Liner - Nude, $9.20 on Amazon


I recently have been searching to find a product to give me that soft glam look, and I came across some inspiration from instagrammer jasmine_hakobyan.


(Maybe should I say former instagrammer? I was unsuccessful in finding her profile again. Good thing I took a screenshot! Always take a screen shot when you see something inspirational!!!)

I usually use my white eyeliner by MAC  (Fascinating Eye Kohl, $16) for my waterline, in order to give me that fierce wide awake look, but I noticed that nude eyeliner also looks very natural and creates a softer glow.

Here is the swatch on my skin

and now on my face

Left: Nude          Right: White


Now with this Soft Glam Eyeliner, I see many Brunch Makeup Looks in my future! And yes, I will have a mimosa with this glam!


I can't wait to start creating all these new looks for the fall season, and stay tuned next month for the next haul!

Be sure to follow us on Instagram and Facebook!

Glammie Love,

Bex

September Makeup Haul Part II

Part II of the Haul consisted of buying some basic makeup products:
NYX Jumbo Eye Pencils 601 Black Bean and 604 Milk, $4.50 each on their website
NYX Sharpener sold for $4.50 on their website and $4.00 on Amazon


The sharpener has 2 slots, one that can sharpen the jumbo eye pencils and the other slot for regular eyeliners or lip liners. If you use your jumbo eye pencils as a base coat and notice the tip is getting dull and that it's time to sharpen it, BEWARE...you may actually make it worse. Here's a nifty trick to make sure your jumbo pencils stay sharp.


This is a lovely 1:46 video by Youtuber Kendall Rae, showing the best way to sharpen these jumbo bad boys.


And here's the reason to get these NYX jumbo eye pencils pronto... 

THE RICH HUES


Let's start by looking at the bottom half of the swatches.  First, you see a normal eyeshadow swatch with no black base.  Above that, the next swatch is the rich black base by itself, and then above that, you can see the gorgeous royal purple hue it creates when combined together.

Now for the top half, you first see the copper-ish eyeshadow swatch with no white base.  Above that, we have the white base, and then at the very top, we have the eyeshadow and white base combined to make this amazing metallic rust color.

Now, if you're like me, you will wonder, with the same eyeshadow color, what color will come out when you use the black base and what color will come out when you use the white base. Well, see for yourself below.

Left: The Same Shadow with the Black Base        

Right: The Same Shadow with the White Base


If you don't have these 2 jumbo eyeliner pencils, I recommend you buy them A.S.A.P. and start having fun swatching your eyeshadow with them!

Please look out for the final part of the September Makeup Haul (Part III )to feature
Rimmel London ScandalEyes Waterproof Kohl Kajal Eye Liner- Nude


Be sure to follow us on Instagram and Facebook!

Glammie Love,

Bex


Monday, September 29, 2014

September Makeup Haul Part I

The best part of internet shopping is that it feels like its Christmas time, no matter the season! You eagerly track your products to see when the goodies will be delivered to you door. Then, it happens... The sheer joy you receive when you see the cardboard box arrive and you rip it open to see all the cosmetics and brushes spill out onto your lap.

Part I of this Makeup haul will feature:
Sigma Tapered Highlighter Brush F35 sold for $24.00 on their website and $24.00 on Amazon
Anastasia Beverly Hills Build Your  Own: Contour Palette, $14.00 for individual pans, but highly recommended to bundle 6 pans for $40.00

Anastasia Beverly Hills: Build Your Own: Contour Palette + Sigma F35

Out of all my makeup haul goodies, these 2 products are what I was most excited about.

Back in August, I bought Becca: Shimmering Skin Perfector Pressed- Moonstone, $38.00 as my new highlighter, since I wanted to try a powder highlighter to replace my highlighting creams, which I had been using. However, I was struggling to determine the best brush to use for my new powder highlighter. Borrowing my glam partner Jaz's Sigma Tapered  Highlighter F35 Brush cued a lightbulb going on and "angelic realization music" in my head (if you cant imagine it, listen to the first 4 seconds of The Simpsons Opening Scene). I mean, after all, Sigma is a name brand and used by professional makeup artists everywhere, so if you can't afford to buy the entire set, know which brush to splurge for, and this brush is definitely it! But if you're going to have a nice brush, you have to have options, and that is when I decided it was time for a customized contour palette.

The great thing is, if you're the type to feel overwhelmed by so many options, Anastasia makes preselected contour kits. On the other hand. if you're like me and you want to study your options and do some research, then this is an idea on how to go about doing it. I do not live anywhere near an Anastasia Beverly Hills Salon, so it took research and a leap of faith to select the right 6 pans.

Step 1: Find inspiration on Instagram, preferably with someone that appears to have similar skin tones, and of course take a screen shot! 


Thanks to Jayrozze24, this picture alone has made it so much easier for me to select the right pans: Champagne, Banana, Peaches & Cream, and Camel!  These checked off 4 out of the 6 shades I needed.

I still, however, had 2 more spots to fill. This involved more digging, since I was not one of the lucky people to have the contour book at my disposal.

Step 2: Google Search

Nothing like a quick Google search to answer your questions, or in this case feed my makeup addiction. One of the top few links took me to
http://www.lindastephanie.com/anastasia-contour-book-contour-kit-refills/


And here we can see has the picture of the pan, the pan name, and the description...PERFECT!
If you cannot read the print, I urge you to visit the site for an easier read.


After going back and forth for 30 minutes, and coming close to pulling out my hair (just kidding, I don't do that, its not good for your hair), I was able to pick out 2 more colors: Golden Peach and Clay. I wanted to have a shade that was for light to medium and another shade for medium to tan. I did this because, like most people, I know I get quite a bit darker in the summer and fall, and then I will get lighter during the winter and spring. 

Top Left to Right: Champagne, Banana, Golden Peach

Bottom Left to Right: Peaches & Cream, Camel, Clay


Swatches


Champagne is a highlighter, and if you would want more depth to it, I recommend putting champagne over Banana. As you can see, I have a huge chunk of Peaches & Cream on my arm, but it was because, when the flash was not on, it appeared to be identical to my skin, making it hard to see where I put the original swatch mark. This means that, when I start getting a bit paler, it will be a great skin tone color to set any creams I may be wearing. The same is true for Banana, which will be a lovely shade to set my concealer under my eyes. As for Camel, I love how it is a light contour. I will probably use this to enhance my nose. It will not be too abrasive like some makeup fails where your nose looks like a rectangle has been outlined on the middle of your face. Lastly, Clay will be perfect since it's dark enough to help enhance my cheeks. Deep colors and shades are definitely in style for fall!  

Stay Tuned for Part II and Part III of the September Makeup Haul.

Be sure to follow us on Instagram and Facebook!

Glammie Love,

Bex

Monday, September 8, 2014

Welcome!

Welcome to our blog!

We're a couple of friends that share a passion and, dare we say it, obsession with makeup, hair, and everything that relates to beauty. We've dedicated much of our time and (let's face it) money on this little hobby of ours, so we decided to share it with the masses (well... whoever stumbles across us anyway.)  Although we both have had long relationships with makeup throughout our lives, the rise of makeup artists on social media has only inspired us further. Without them, we wouldn't be nearly as knowledgeable about any of the lovely little products that make our insides sing! So, in order to give them credit, we will not only be creating our own tutorials and reviews, but we will also be linking our favorite Instagram and Youtube makeup looks and artists, as well as linking all of the products that they use to create their looks. Just call us the one stop shop for all of your makeup needs!

 Keep checking back with us as we build our blog and our product database, and please feel free to leave any feedback that you may have for us. We've never blogged before and would love to hear from the internet community!

 ~Jaz and Bex