Showing posts with label Tutorials. Show all posts

Tuesday, June 9, 2015

How to Clean Your Brushes!


PRODUCTS USED

- Cinema Secrets Brush Cleaner: http://goo.gl/MnDveb
- Johnson's Baby Shampoo: http://goo.gl/3OeDc1
- Olive Oil
- Dawn Dish Soap
- Ivory Bar Soap: http://goo.gl/vQqgiJ

Thursday, October 9, 2014

Air Travel Essentials - Part 3 of 3

Well, here it is... The final installment of my Air Travel series!  If you haven't read part one or two, you can just click on these links: Part 1, Part 2.

What more do I have to impart to y'all, you ask?  Well, it occurred to me that this is a makeup-centered beauty blog, so I would be remiss if I didn't include any sort of makeup in the series.

I'm going to be honest: I usually don't put makeup on after a long plane ride.  Travel in and of itself is tiring and stressful, so I don't usually feel like putting much effort toward my appearance until after a hot shower.  After all, who do I have to impress?  I'm married!  (I'm joking, of course... I'm a firm believer in the notion that makeup is not to impress others, but to make yourself feel beautiful and confident.)  Nevertheless, there have been a few times where I felt like putting on some pre-baggage claim makeup was a necessity.  It's usually when I have to head to a meeting or an event right after landing, with no time for a stop at the hotel.  For these times, I have a simple makeup routine that I use.

Post-Flight: Looking Fresh-Faced

When putting on makeup at the airport, I'm not trying to look like a Kardashian.  Even though everyone knows that I love to contour my face, there's a time and place for that, and an airport bathroom is definitely not it.  I just try to make myself look bright-eyed, fresh-faced and well-rested (even when I'm not any of those things).   I need products that aren't only easy to pack, but also easy to use and that don't require a lot of tools.

From Left to Right: Smashbox Camera Ready CC Cream, NARS Radiant Creamy Concealer, Too Faced Perfect Eyes Waterproof Eyeliner, Smashbox Waterproof Kohl Liner, Anastasia Beverly Hills Brow Wiz, Vincent Longo Lip/Cheek Gel Stain, Too Faced Better Than Sex Mascara, Estee Lauder Bronze Goddess Bronzer and BH Cosmetics Kabuki Brush
This photo might as well be titled "Jaz's Must-Have Makeup Products."  I swear by every single one of these products, but I do realize that they can be pricey, so I will also list a drugstore alternative for all you thrifty glammies.  Also, while I usually advocate for using brushes because they're more hygienic, I realize that it's probably not convenient in this case, which means applying with my clean fingers, unless otherwise stated.  Anyway, here's what my simple airport makeup would look like:
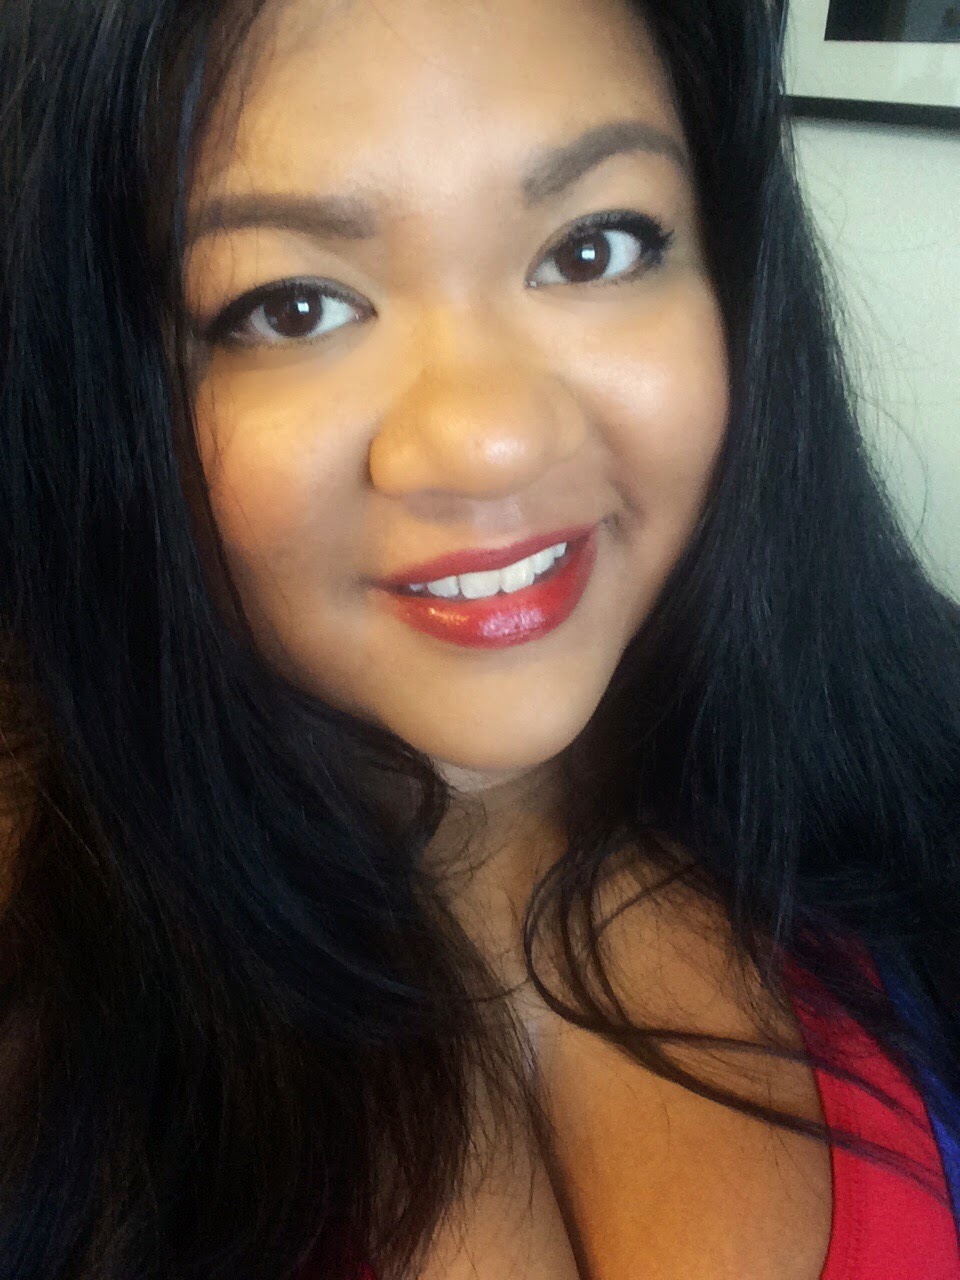
This look is simple, effortless and only takes about 5-10 minutes!
Y'all should know by now that I strongly promote hydrating your skin after being on a plane, and it doesn't stop when I put on my makeup.  I tend to favor a CC or BB cream like this one by Smashbox ($42) over a traditional foundation because it hydrates much like a moisturizer would, while still evening and perfecting my skin.  A great drugstore alternative would be the Maybelline Dream Fresh BB Cream ($7.19).

After putting on my CC Cream, I highlight my under-eye area with my NARS Radiant Creamy Concealer ($29) to brighten up my eyes, as well as dabbing a little on my forehead, chin and cupid's bow.  A drugstore alternative for this would be Maybelline Instant Age Rewind Eraser Concealer ($7.99).

I feel like a defined brow really makes a girl look effortlessly put together, and the Brow Wiz ($21) is the hands-down best product in the market for this.  The formula of the pencil glides on easily without smudging, and the little spooly brush on the end helps to brush the hairs into place.  The alternative to this product would be the Revlon Brow Fantasy ($5.91).

I love eyeliner.  I actually have been known to walk out of the house wearing nothing on my face but eyeliner, and I felt completely put together.  For this particular look, I take Too Faced Perfect Eyes Waterproof Eyeliner ($18), line the outer half of my eyes and smudge it a little on the ends.  CoverGirl Perfect Point Plus ($5.69) would also do the trick.  Just for extra oomph, I hit my waterline with a nude eyeliner, which makes my eyes look even bigger.

Vincent Longo ($22.50) makes one of the best lip and cheek stains that I've ever used.  I love stains because they look effortless, but I dislike them because they tend to be drying.  This one is one of the very few stains that don't dry out my lips.  The best part is that it can be dabbed on the cheeks, and you can use it as a blush!  I love multi-purpose products for traveling!  The drugstore option for this item is the Revlon ColorStay Moisture Stain ($7.99).

Bronzer is a completely optional part of this makeup look.  I personally prefer to just touch the outside of my face with bronzer to slim it, but I realize that it's not for everyone.  If you were to use bronzer, my favorite is the Estee Lauder Bronze Goddess Powder ($36.)  I also like the Maybelline Fit Me Bronzer ($4.40).  I apply my bronzer with the BH Cosmetics Kabuki Brush ($11.01), which I love for travel because, even though it's dense and fluffy, it comes at a great price and even includes a cute little leather carrying case.

Of course, no look is complete without some mascara to make your peepers pop.  I never thought that the Better Than Sex Mascara ($23) by Too Faced would ever be topped on my list, but it seems that L'Oreal's Voluminous Miss Manga Mascara ($7.99) is giving it a run for its money.

There you have it!  That's all of my air travel tips!  Thanks for sticking with me for all three of these posts... I know that they're super long.  I hope you found at least a couple of tips that were helpful.  Happy flying!

Glammie Love,
Jaz

Wednesday, September 17, 2014

One Palette, Five Looks with Urban Decay's Vice 3

Two weeks ago, we were just browsing our Instagram (follow us here!), and one of our favorite makeup brands teased a photo of their new palette: Urban Decay's Vice 3.  We instantly fell in love and began the countdown until it would be in our hands.  Well, the time has finally come... It's here!


Isn't it beautiful?!?
I would try to describe the palette for you, but why would I when the geniuses over at Urban Decay can do it so much better?
"With so many different finishes—matte, satin, sparkle and even metallic (to echo the iced-out metallic look of the palette itself), this palette is made for experimentation. The shades are arranged in columns: neutrals on the left, jewel tones in the middle and smoky shades on the right. Pair up the vertically color-coordinated quads or go wild and mix them up. Our Pigment Infusion System™ gives each shade its velvety texture, rich color, serious staying power and blendability."
Since you can use the palette in quads, I decided to not only swatch each color, but to create a look only using each quad.  So without further ado, here's One Palette, Five Looks! (I'm sorry about the lighting.  I'm still trying to figure out where I need to put myself when I take makeup selfies.)

Look 1: Everyday Neutral

I love a neutral eye for during the day.  Whether I'm going to work, meeting with a friend for lunch, shopping or even just running errands, this eye is my go-to when I want to look put together, but still natural.  The first four shades (Truth, Undone, Downfall and DTF) are perfect for any of these outings.  They were effortless to blend and not chalky at all, which can be a problem with matte shades.  They actually reminded me of the Naked Basics palette and that in itself is a huge compliment.

Truth on the lid and browbone, Undone as a transitional shade, Downfall as the crease color and DTF on the outer V
Look completed with Kat Von D Everlasting
Love Liquid Lipstick in Lolita

From left to right: Truth, Undone, Downfall, DTF


Look 2: Bright and Tropical

This look, which featured Dragon, Freeze, Heroine and Brokedown, was a little unconventional for me since I rarely work with greens and blues.  However, in the interest of using every shade in the palette, I sucked it up and went for it, and I'm glad I did.  Since I decided to use only one quad per look, I didn't end up using a transitional shade, but I think my eye may have benefited from using one.  Thankfully, any of the browns used in Look One would've made a perfect transition.  As beautiful and pigmented as these colors were, they all had at least a slight shimmer, so I wouldn't normally use any for my crease, although I did in this case.  Brokedown was my absolute favorite out of the four... it's a little bit of gold, a little bit of khaki, a little bit of brown and a whole lot of awesome!

Brokedown on the lid, Freeze in the crease, Heroine in the outer V and Dragon on the lower lashline
From left to right: Dragon, Freeze, Heroine
and Brokedown
Look completed with Smashbox Be Legendary
Long Wear Lip Laquer in Off Duty


Look 3: Fall Fabulous

Of all of the looks that I created, I think this one was my favorite.  Maybe it has to do with the fact that the thought of fall makes me giddy!  I feel like this quad (Vanity, Lucky, Reign and Bobby Dazzle) has everything that I want in a fall eye look: a great brown shade, a shimmery copper, an awesome highlight and a pop of color.  What else does a girl need?  

Lucky all over the lid, Reign in the outer crease, Bobby Dazzle on the browbone and inner corner and Vanity on the lower lashline
From left to right: Vanity, Lucky, Reign,
Bobby Dazzle

Look completed with Gerard Cosmetics lipgloss in
Cocoa Bean


Look 4: Jewel Tone Goddess

I'm going to preface this by saying that this was my least favorite of all the looks that I created. These four colors (Alien, Alchemy, Bondage and Sonic) were automatically my favorites when I swatched them, but something got lost in translation when I put them on.  I'm mentioning this just because I don't want the look to shortchange these colors, which I think are absolutely gorgeous. Anyway, these beautiful jewel-toned reds, pinks and plums would be perfect for a fall-inspired nighttime look.  Despite the fact that I wasn't crazy about this particular look, Sonic is literally my favorite color in the entire palette.


Alchemy all over the lid, Alien in the inner corner, Bondage on the outer crease and Sonic on the lower lashline
Left to right: Alien, Alchemy, Bondage, Sonic
Look completed with Dior Addict Fluid Stick in
Trompre L'Oeil

Look 5: Club Glam

The last look used Last Sin, Angel, Defy and Revoler and is a blown-out smokey eye perfect for bringing a little bit of glam to a night out.  I loved the sparkle in Last Sin and Angel, but I wouldn't have complained if Revolver had been a bit darker.  I think it may have brought the smokiness to another level and made the look a little more dramatic.  Having said that, I still think that the look and the colors were beautiful.

Last Sin all over the lid, Angel in the upper crease, Defy in the lower crease and, to smoke out the lower lashline, Revolver on the outer lid and on the lashline
Left to right: Last Sin, Angel, Defy, Revolver
Look completed with Sephora Luster
Matte Long-Wear Lip Color in Deep Plum


Overall, I think that this is one of those palettes that can create any look you want, whether it be subtle and sweet or bold and daring.  It's a must-have for me!

I hope you enjoyed my take on the Vice 3 Palette!  How would you use it?

~Jaz

Pick up your own Vice 3 from Urban Decay or from Sephora.

All of the looks from this post were created with the following products: